 Save
Save My nephew discovered Cookie Run Kingdom last winter, and suddenly every conversation orbited around GingerBrave, that plucky little cookie with his confident grin. One snowy afternoon, he asked if we could make cookies that looked like him, and I realized I'd never actually made proper gingerbread before—just the store-bought dough shortcuts. Standing in the kitchen with flour dust settling on my apron, I decided this was the moment to get it right, to understand why real gingerbread tastes like comfort wrapped in spice.
That first batch came out of the oven while my nephew was napping, and I couldn't resist tasting one warm. The smell alone—ginger, cinnamon, and that caramelized molasses note—transported me back to my grandmother's kitchen before I even remembered I was supposed to be a grown-up making cartoon cookies. When he woke up and saw them cooling on the rack, his face did that thing where pure joy overtakes everything else, and we spent the next two hours painting on little blue and red royal icing details while he narrated GingerBrave's entire backstory.
Ingredients
- All-purpose flour (2 1/4 cups): This is your foundation, and measuring it right matters more than you'd think—spoon and level rather than scooping straight from the bag, or you'll end up with dough that's too dense.
- Ground ginger (2 tsp): Fresh ginger powder makes a noticeable difference; if yours has been in the cabinet for two years, replace it because old spices are why gingerbread sometimes tastes one-dimensional.
- Ground cinnamon (1 tsp): Don't skip the other spices thinking cinnamon will carry the load—each one plays a specific note in this flavor chord.
- Ground cloves (1/4 tsp) and nutmeg (1/4 tsp): These are the secret depth-makers; use a fresh container if you can, as they fade faster than other spices.
- Baking soda (1/2 tsp): This reacts with the molasses to give you that gentle spread and tender crumb you're after.
- Salt (1/4 tsp): A small pinch that somehow makes the spices taste more like themselves.
- Unsalted butter (1/2 cup), softened: Room temperature is non-negotiable here; cold butter won't cream properly with the sugars, and your cookies will be dense instead of tender.
- Brown sugar (1/2 cup packed) and granulated sugar (1/4 cup): The brown sugar brings moisture and molasses undertones, while the white sugar helps with structure and crispness at the edges.
- Egg (1 large): Your binder and the thing that makes the dough cohesive enough to roll without crumbling.
- Molasses (1/3 cup): This is the soul of the cookie; unsulfured molasses is milder and sweeter, sulfured is bolder—either works, but don't use blackstrap unless you want an almost-bitter intensity.
- Vanilla extract (1 tsp): A teaspoon of pure vanilla (not the imitation stuff) rounds out the spices and adds warmth.
Tired of Takeout? 🥡
Get 10 meals you can make faster than delivery arrives. Seriously.
One email. No spam. Unsubscribe anytime.
Instructions
- Set up your baking space:
- Preheat to 350°F and line two baking sheets with parchment paper, which takes the anxiety out of cleanup and prevents sticking.
- Build the dry mixture:
- Whisk together all the flour, spices, baking soda, and salt in a medium bowl; this pre-mixing distributes the leavening and spices evenly so you don't get pockets of pure cinnamon or unactivated baking soda.
- Cream the butter and sugars:
- Beat the softened butter with both sugars until the mixture is light, fluffy, and noticeably paler than it started—this takes about 2 to 3 minutes with an electric mixer and signals that you've incorporated enough air. If you're using a hand whisk, your arm will know when it's ready.
- Add the wet ingredients:
- Drop in the egg, then the molasses, then the vanilla, beating after each addition until the mixture looks relatively smooth; it might look slightly separated at first, but keep mixing and it'll come together.
- Combine wet and dry:
- Add the dry ingredients to the wet mixture in three additions, stirring gently each time and stopping as soon as you don't see white streaks of flour—overmixing at this stage toughens the cookies.
- Chill the dough (optional but smart):
- Divide the dough in half, wrap it in plastic wrap, and refrigerate for at least 30 minutes; cold dough is easier to roll and holds its shape better in the oven, which matters if you're going for defined little gingerbread people.
- Roll and cut:
- Dust your work surface lightly with flour, then roll the dough to about 1/4 inch thickness and use your gingerbread man cutter to shape them, placing each cookie about 2 inches apart on the baking sheets so they have room to bake evenly.
- Bake with attention:
- Bake for 10 to 12 minutes—the edges should look set and slightly darker, while the centers still look a tiny bit underbaked; they'll continue cooking as they cool, so resist the urge to bake them until they look completely firm.
- Cool with patience:
- Let them sit on the baking sheet for 5 minutes so they firm up enough to move without breaking, then transfer them to a wire rack to cool completely before decorating.
- Decorate if you're in the mood:
- Once completely cool, pipe on royal icing to create faces, buttons, and details; if you're making GingerBrave, red and blue accents with white piping make him instantly recognizable.
 Save
Save Three years later, my nephew is still asking me to make these every December, and now I catch myself standing at the kitchen window watching the cookies bake, thinking about how a recipe can become a small tradition that connects you to someone. It's not just about the cookies anymore; it's about that snowy afternoon when he showed me his favorite character and I showed him what happens when you take time to make something real.
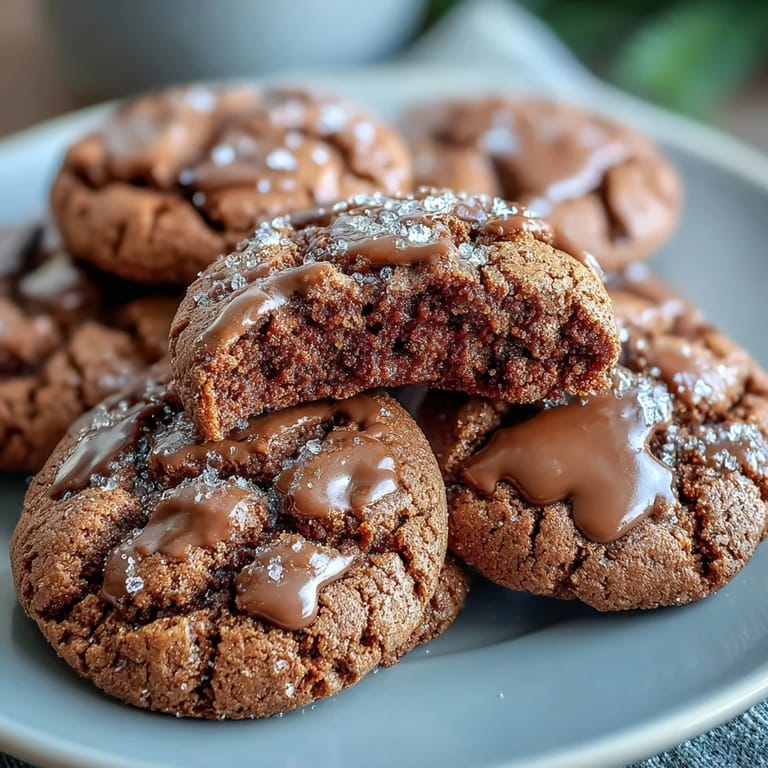
The Gingerbread Game-Changer: Why Molasses Matters
I used to think all sweeteners were basically interchangeable until I understood what molasses actually does. It's not just sugar—it's caramelized sugar with depth, a subtle bitterness that balances sweetness, and a moisture content that keeps these cookies from drying out. When you use real molasses instead of shortcuts, people taste the difference immediately, even if they can't name what makes these cookies feel more grown-up and complex than typical gingerbread.
Texture Science: Crispy Edges, Chewy Centers
The magic happens in those last two minutes of baking—the edges firm up and caramelize slightly while the centers are still setting. If you pull them out too early, they collapse; pull them out too late, and they become crispy all the way through, which is fine if you like them that way, but misses the textural contrast that makes people reach for a second one. The key is trusting that moment when they look slightly underbaked in the middle, because that's when the carryover heat does its invisible work.
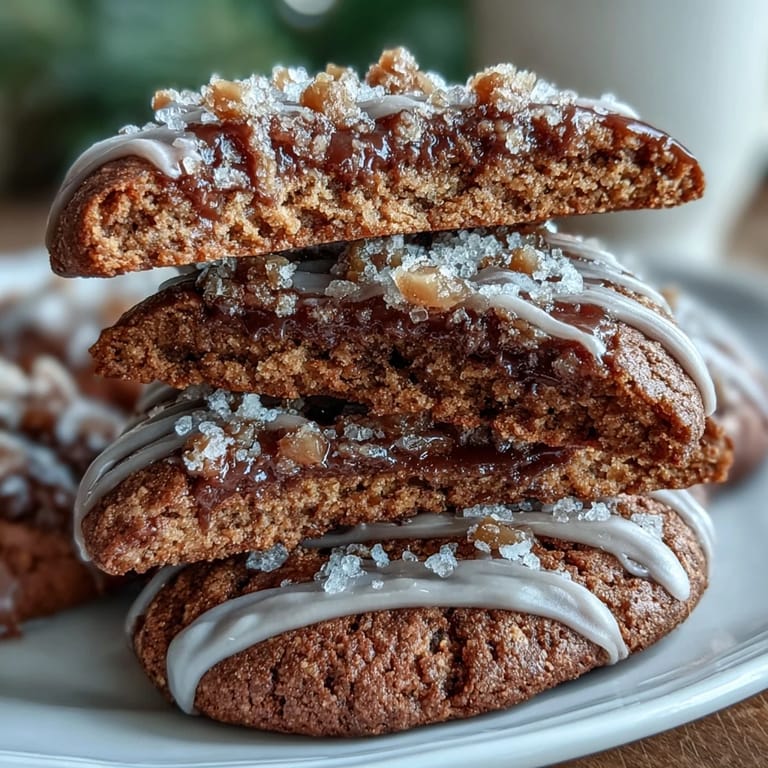
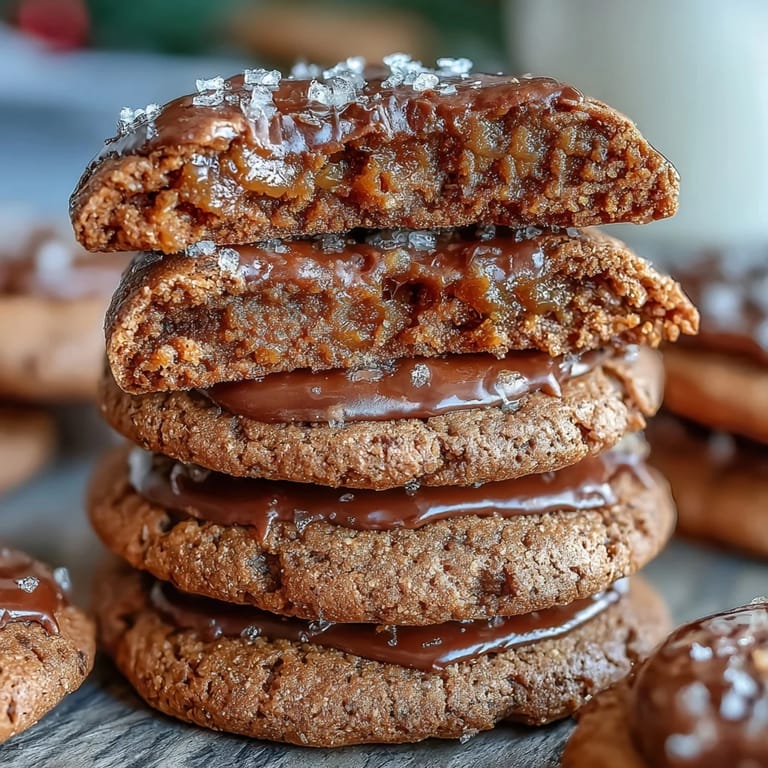
Decorating Like You Mean It
Royal icing transforms these cookies from simple treats into little edible characters, and the process is meditative if you let it be. You can buy pre-made royal icing, whip up your own from egg whites and powdered sugar, or even use store-bought frosting thinned with milk if you're short on time and patience.
- Pipe details while the icing is still wet so colors can blend slightly, or let each layer dry completely for sharp, defined lines depending on the look you're going for.
- A small piping bag or even a squeeze bottle with a fine tip gives you more control than you'd expect, and even wobbly lines read as charm rather than mistake.
- Let the decorated cookies set on parchment paper for at least an hour before stacking them, or the icing will smudge and you'll be frustrated with yourself.
 Save
Save Make these for someone you want to see smile, or make them just because your kitchen deserves to smell like cinnamon and molasses and the idea that small, spiced cookies can carry meaning. They're easier to make than they taste, which is the best kind of recipe to have in your back pocket.
Recipe FAQs
- → What spices are used in these gingerbread bites?
The blend includes ground ginger, cinnamon, cloves, and nutmeg, contributing warm, aromatic flavors.
- → How can I make the bites chewier?
Baking for the shorter recommended time keeps edges crisp but preserves a softer, chewy center.
- → Can I decorate these bites?
Yes, royal icing and mini candies can be used to add colorful decorations and festive touches.
- → Is chilling the dough necessary?
Chilling the dough for at least 30 minutes helps with rolling and cutting but is optional.
- → What pairs well with these gingerbread bites?
Hot cocoa or spiced tea complements the spicy, sweet flavors perfectly.
- → Are these bites suitable for vegetarians?
Yes, all ingredients used are vegetarian-friendly.